User Interface
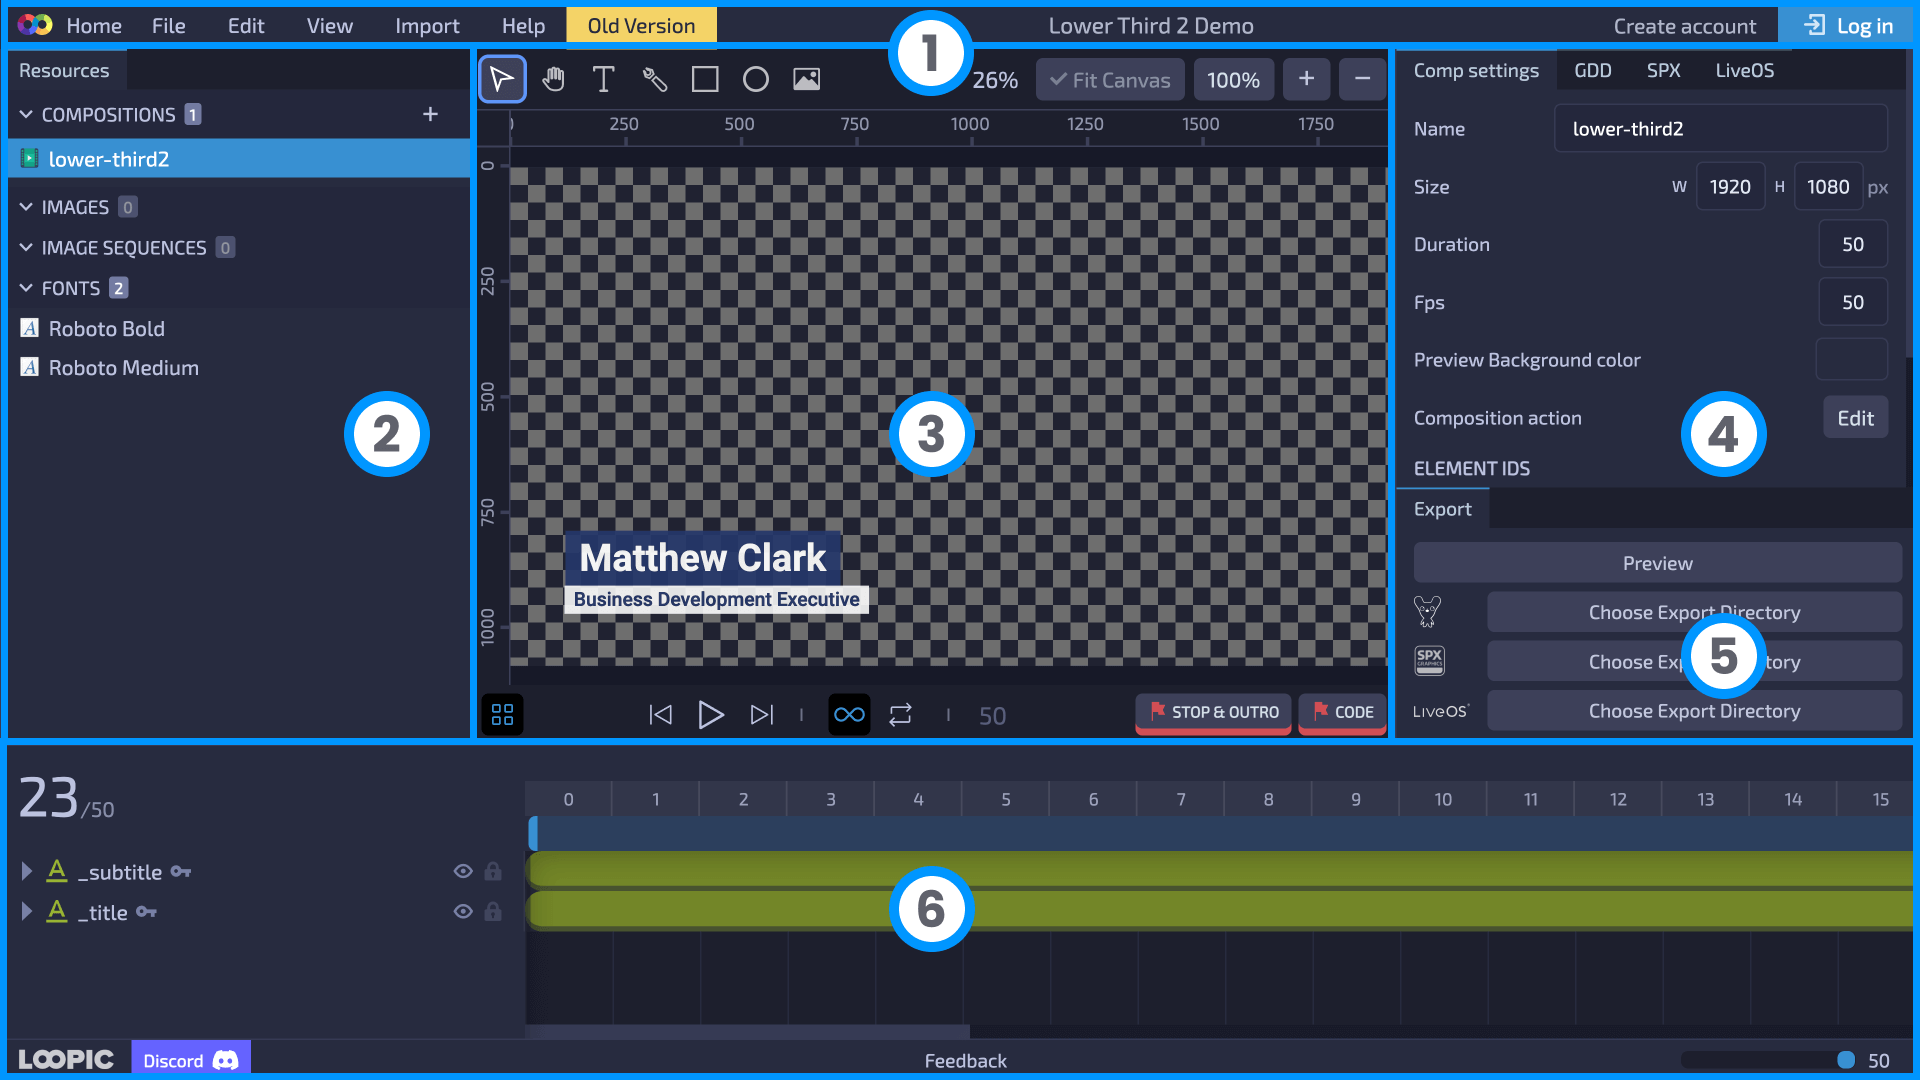
Loopic's user interface is made to help you create, animate, and program all in one place. It's split into 5 main sections:
- Menubar
- Resources panel
- Canvas panel
- Inspector panel
- Export panel
- Timeline panel

Let's look closer at each part.
Menubar
The Menubar sits at the very top of Loopic's interface. It holds buttons for key actions like saving, loading projects, editing layers, importing resources, and more. Additionally, it displays details about the current project and the user who's actively working on it.

Resources panel
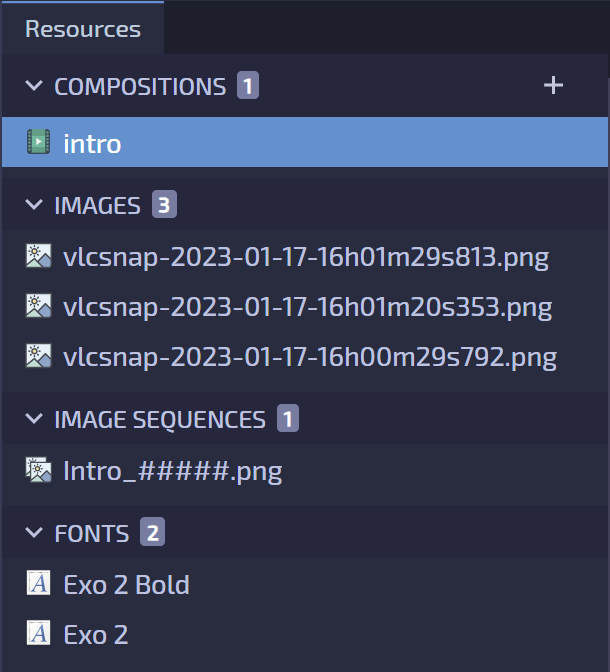
The Resources panel is divided into 4 sub-sections:
- Compositions
- Images
- Image sequences
- Fonts
Each resource offers different functionalities accessible via right-click.

Canvas panel
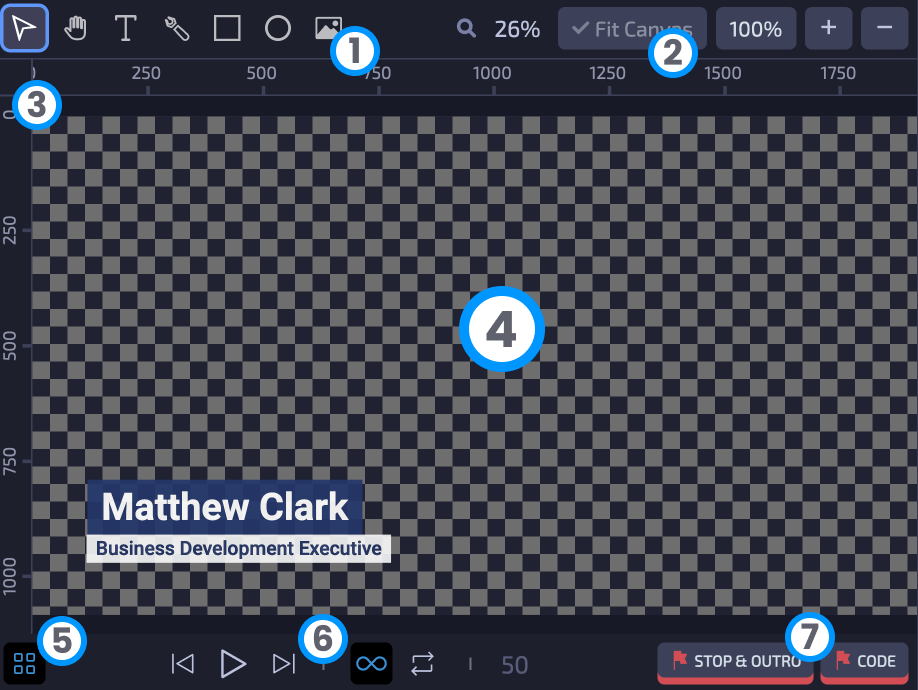
The canvas panel is at the heart of Loopic's interface, where all the designing happens. Here, you'll find several tools:
- Toolbox with drawing tools
- Zoom options
- Ruler
- Canvas area
- Snapping toggle
- Playback controls
- Shortcuts for frame actions

You can also adjust the visibility of the ruler, snapping, and pixel grid from the View dropdown menu in the Menubar panel.
Inspector panel
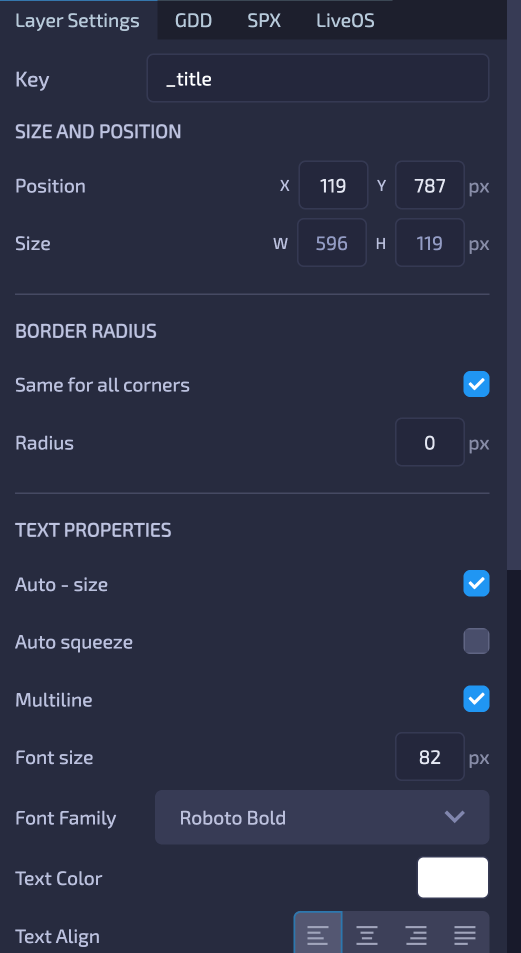
The Inspector panel's functionality varies based on the selected layer. It displays all available options for the specific layer. While some options also appear in the Timeline section, the Inspector panel is for viewing properties rather than animating them.

Export panel
The export panel contains buttons for single-click exporting of created graphic templates in the desired folder. It also hosts a button for previewing a template.
Timeline panel
This panel is where the animation takes place. It consists of several elements:
- Active frame and total frames in the composition
- Actions bar
- Frame bar
- Workspace bar
- Layers and keyframes
